Tuesday, January 28, 2025

Achieving Radiant Skin: A Comprehensive Guide to DIY Face Packs for Skin Brightening

The pursuit of radiant, even-toned skin is a common goal for many. While numerous commercial products promise skin brightening effects, the growing interest in natural and DIY solutions has led to a resurgence in homemade face packs. This article explores the efficacy of various DIY face packs for skin brightening, comparing before-and-after results, potential benefits, and important considerations for safe and effective usage.

Understanding Skin Brightening and its Mechanisms

Skin brightening, also known as skin lightening or illumination, aims to reduce the appearance of hyperpigmentation â€" areas of darker skin tone caused by an overproduction of melanin. Melanin is the pigment responsible for skin color, and its uneven distribution can lead to blemishes, age spots, sunspots, and melasma. While some degree of hyperpigmentation is a natural part of aging, excessive pigmentation can significantly affect one's confidence and self-esteem.

Factors Contributing to Hyperpigmentation

Several factors can trigger hyperpigmentation, including:

  • Sun exposure: Ultraviolet (UV) radiation from the sun is a primary culprit, stimulating melanin production.
  • Hormonal changes: Pregnancy (melasma), hormonal imbalances, and certain medications can influence melanin production.
  • Inflammation: Acne, wounds, and other skin irritations can lead to post-inflammatory hyperpigmentation.
  • Genetics: Predisposition to hyperpigmentation can be inherited.
  • Age: Age spots (solar lentigines) are a common form of hyperpigmentation associated with aging.

Mechanisms of Action of DIY Skin Brightening Packs

DIY face packs work through various mechanisms to improve skin tone and reduce hyperpigmentation. These include:

  • Exfoliation: Many ingredients in these packs, such as yogurt, lemon juice, and oats, gently exfoliate the skin, removing dead skin cells and revealing brighter, more even-toned skin underneath.
  • Antioxidant properties: Ingredients like turmeric, honey, and aloe vera possess potent antioxidant properties, combating free radicals that damage skin cells and contribute to hyperpigmentation.
  • Anti-inflammatory effects: Certain ingredients, including aloe vera and cucumber, have anti-inflammatory properties, reducing inflammation that can lead to hyperpigmentation.
  • Natural bleaching agents: Some ingredients, such as lemon juice and papaya, contain natural bleaching agents that can lighten dark spots, but should be used cautiously.

Popular DIY Face Packs for Skin Brightening: Before and After Results

Numerous DIY face packs are touted for their skin brightening properties. The effectiveness varies depending on individual skin type, consistency of application, and the specific ingredients used. It's crucial to perform a patch test before applying any new ingredient to the entire face to check for allergic reactions.

Turmeric and Yogurt Face Pack

Before: Skin with noticeable dark spots, uneven tone, and potentially dull appearance.

After (with consistent use): A reduction in the appearance of dark spots, a more even skin tone, and an overall brighter complexion. Turmeric's curcumin possesses anti-inflammatory and antioxidant properties, while yogurt's lactic acid gently exfoliates.

Gram Flour (Besan) and Rosewater Face Pack

Before: Skin with dullness, minor blemishes, and uneven texture.

After (with regular application): Improved skin texture, reduced appearance of blemishes, and a subtle brightening effect. Gram flour acts as a natural exfoliant, while rosewater soothes and hydrates the skin.

Aloe Vera and Honey Face Pack

Before: Skin prone to irritation, redness, or sun damage.

After (with consistent use): Reduced redness, improved hydration, and a healthier-looking complexion. Aloe vera's soothing and anti-inflammatory properties calm irritated skin, while honey's antioxidants protect against damage.

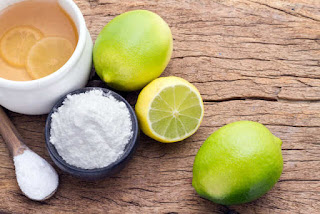
Papaya and Lemon Face Pack (Use with Caution)

Before: Skin with moderate hyperpigmentation.

After (with careful, infrequent application): Potential for lightening of dark spots, but requires careful monitoring due to the sensitivity of lemon juice. Papaya's enzymes gently exfoliate, while lemon's citric acid has bleaching properties, but can also be irritating.

Important Considerations and Safety Precautions

While DIY face packs offer a natural approach to skin brightening, it is essential to prioritize safety and follow these precautions:

  • Patch test: Always perform a patch test on a small area of skin before applying any new face pack to your entire face.
  • Sun protection: Many skin brightening ingredients increase sun sensitivity. Always apply a broad-spectrum sunscreen with an SPF of 30 or higher during the day, even on cloudy days.
  • Consistency: Results with DIY face packs are gradual and require consistent application over several weeks or even months.
  • Ingredient quality: Use fresh, high-quality ingredients whenever possible.
  • Avoid over-exfoliation: Over-exfoliating can irritate the skin and worsen hyperpigmentation. Start with infrequent applications and gradually increase frequency as tolerated.
  • Consult a dermatologist: If you have severe hyperpigmentation, persistent skin issues, or are unsure about which ingredients are suitable for your skin type, consult a dermatologist.
  • Limit sun exposure: Minimize direct sun exposure, especially during peak hours (10 am to 4 pm), to prevent further hyperpigmentation.
  • Avoid harsh ingredients: Some ingredients, like lemon juice, can be overly harsh and irritating for sensitive skin. Use them cautiously and dilute them if necessary.

In conclusion, DIY face packs can be a valuable tool in achieving brighter, more even-toned skin. However, it's crucial to select ingredients carefully, perform patch tests, use them consistently, and prioritize sun protection. Remember that individual results vary, and patience is key. For significant hyperpigmentation or persistent skin concerns, consulting a dermatologist is recommended for a personalized treatment plan.

Read More..

Skin whitening at home with coconut oil and lemon

Unveiling Brighter Skin: A Coconut Oil and Lemon Journey

The allure of radiant, even-toned skin is universal. Countless products promise miracles, but a simple, natural approach might be closer than you think. This article explores the potential of a home remedy combining the nourishing properties of coconut oil with the brightening effects of lemon juice. While results vary depending on individual skin type and consistency, this method offers a gentle, accessible path towards achieving a more luminous complexion. We'll delve into the science behind this approach, guide you through the process, and discuss crucial considerations to ensure safety and effectiveness.

Understanding the Ingredients: Nature's Skin-Brightening Duo

Coconut oil, a tropical treasure, isn't just for cooking. Its rich fatty acids, including lauric acid, provide deep moisturizing benefits. This hydration is crucial because dry, dehydrated skin often appears dull and uneven. By effectively moisturizing, coconut oil creates a healthy canvas for brighter skin to shine through. It also possesses some anti-inflammatory properties, which can soothe irritated skin and minimize potential side effects from the lemon juice.

Lemon juice, on the other hand, contains citric acid â€" a natural alpha-hydroxy acid (AHA). AHAs are known for their exfoliating properties. Citric acid gently removes dead skin cells, revealing the brighter, fresher skin underneath. This exfoliation process helps to even out skin tone and diminish the appearance of blemishes or age spots. However, it’s important to remember that lemon's acidity can make skin sensitive to sunlight, so sunscreen is essential.

The Coconut Oil and Lemon Skin-Brightening Process: A Step-by-Step Guide

Preparing the Mixture:

Begin by gathering your ingredients: extra-virgin coconut oil (preferably unrefined for its maximum benefits) and freshly squeezed lemon juice. Always use fresh lemon juice, as pre-packaged juices often contain preservatives that might negate the desired effects. Aim for a 2:1 ratio of coconut oil to lemon juice. For example, use two tablespoons of coconut oil to one tablespoon of lemon juice. Mix thoroughly until you achieve a smooth, consistent paste.

Application and Treatment:

Cleanse your face thoroughly before application. Gently apply the mixture to your face and neck, avoiding the delicate eye area. Massage the paste in circular motions for a minute or two to enhance absorption and exfoliation. Leave it on for 15-20 minutes, then rinse with lukewarm water. Pat your skin dry with a soft towel.

Post-Treatment Care:

After rinsing, apply a moisturizer suited to your skin type. This step is crucial as the lemon juice can slightly dry out the skin. Follow up with sunscreen with a high SPF (at least 30) before heading outdoors. This protects your skin from sun damage, a major contributor to uneven skin tone and premature aging. Remember that consistent use is key. Aim for 2-3 times a week for optimal results.

Important Considerations and Potential Side Effects

While generally safe, this home remedy isn't suitable for everyone. Individuals with sensitive skin should perform a patch test on a small area before applying it to the entire face. Lemon juice can cause irritation or allergic reactions in some individuals. If you experience any burning, stinging, or redness, discontinue use immediately and rinse thoroughly.

Avoid excessive sun exposure after treatment, as lemon juice can make your skin more susceptible to sunburn. Also, remember that this is a natural remedy, and results take time. Don't expect immediate miracles. Consistency is key to achieving visible improvement in skin tone and brightness.

Finally, consult a dermatologist if you have pre-existing skin conditions like eczema or rosacea before trying this or any other home remedy. They can provide personalized advice and guidance based on your specific skin needs.

Read More..

Banishing Blemishes & Brightening Skin: Home Remedies for Acne-Prone Skin

Okay, so you've got acne-prone skin and you're dreaming of a brighter, more even complexion? You're not alone! Many people with acne struggle with uneven skin tone and lingering dark spots. The good news is that you don't need harsh chemicals or expensive treatments to achieve a more radiant look. With a little patience and the right approach, you can lighten your skin tone naturally from the comfort of your home. But remember, always patch test any new remedy on a small area of skin first to check for allergic reactions. Let's dive in!

Understanding Acne and Skin Tone

Before we jump into remedies, it's important to understand the connection between acne and uneven skin tone. Acne itself can leave behind hyperpigmentation â€" those pesky dark spots â€" as a result of inflammation. The more severe your acne, the more likely you are to experience this. Plus, some acne treatments can make your skin more sensitive to sun, increasing the risk of darkening. So, we need a gentle approach that addresses both acne and skin brightening simultaneously.

Why "Whitening" is a Misleading Term

Let's be clear: We're not talking about dramatically changing your skin's natural color. The aim is to even out your skin tone, reducing the appearance of dark spots and hyperpigmentation for a more radiant and uniform complexion. "Skin whitening" can sometimes imply unsafe practices, so let's focus on safe and effective brightening instead.

Gentle & Effective Home Remedies

Now for the fun part â€" the remedies! Remember, consistency is key. You won't see results overnight, but with regular use, you should notice a difference over time. And always be patient with your skin â€" it's a journey, not a race!

The Power of Aloe Vera

Aloe vera is a superstar for acne-prone skin! Its soothing properties calm inflammation, and it has natural lightening agents that can help fade dark spots. Simply cut open an aloe vera leaf, extract the gel, and apply it directly to your face. Leave it on for 15-20 minutes before rinsing with cool water. You can do this daily or every other day.

Lemon Juice (Use with Caution!)

Lemon juice is a natural bleaching agent, but it's crucial to use it with extreme caution, especially on acne-prone skin. It can be irritating and make your skin more susceptible to sun damage. Never apply undiluted lemon juice. Instead, mix a small amount of fresh lemon juice with water (a ratio of 1:3 lemon juice to water is a good starting point) and apply it to your face for a few minutes before rinsing. Do this only once or twice a week, and always follow up with a high SPF sunscreen. This is best used at night to minimize sun exposure.

The Soothing Magic of Honey

Honey is a natural humectant (meaning it attracts and retains moisture) and has antibacterial properties that can help fight acne. Raw honey also possesses some skin brightening capabilities. Apply a thin layer of raw honey to your face, leave it on for 15-20 minutes, and then rinse it off. You can use this daily or every other day.

Yogurt's Probiotic Power

Plain yogurt, especially those with live cultures, contains lactic acid which can help gently exfoliate and brighten the skin. Apply a thin layer of plain yogurt to your face, leave it on for 15-20 minutes, and then rinse. You can do this a few times a week.

Turmeric's Anti-inflammatory Benefits

Turmeric is known for its anti-inflammatory and antioxidant properties. It can help reduce redness and inflammation associated with acne and may contribute to a brighter complexion. Make a paste by mixing a teaspoon of turmeric powder with a little water or milk (milk can be extra soothing). Apply it to your face, leave it on for 10-15 minutes, and then rinse thoroughly. Be aware that turmeric can stain, so be careful!

Gentle Exfoliation with Oatmeal

Oatmeal is a gentle exfoliant that can help remove dead skin cells, revealing brighter skin underneath. Grind some oatmeal into a fine powder and mix it with a little water or honey to form a paste. Gently massage this paste onto your skin in circular motions, then rinse thoroughly. Do this once or twice a week.

Sun Protection: The Unsung Hero

Regardless of the remedies you use, sun protection is absolutely essential. Sun exposure can worsen hyperpigmentation and dark spots. Always apply a broad-spectrum sunscreen with an SPF of 30 or higher every morning, even on cloudy days. Reapply every two hours, especially if you're spending time outdoors.

Lifestyle Changes for Brighter Skin

Beyond topical remedies, your lifestyle choices play a significant role in your skin's health and radiance. Let's explore some crucial factors:

Hydration is Key

Drink plenty of water throughout the day to keep your skin hydrated and healthy. Dehydrated skin tends to look duller.

Nourishing Diet

A balanced diet rich in fruits, vegetables, and antioxidants can contribute to a healthier complexion. Consider incorporating foods high in Vitamin C and Vitamin E.

Stress Management

Stress can trigger acne breakouts, which in turn can lead to hyperpigmentation. Practice stress-reducing techniques like yoga, meditation, or spending time in nature.

Sufficient Sleep

Aim for 7-8 hours of quality sleep each night. Sleep is crucial for skin repair and regeneration.

Commonly Asked Questions

Here are some frequently asked questions about home remedies for acne-prone skin:

  • Q: How long will it take to see results? A: Results vary depending on the individual and the severity of hyperpigmentation. You may start noticing a difference in a few weeks, but significant improvement might take several months of consistent use.
  • Q: Can I combine different remedies? A: You can try combining some remedies, but start slowly and introduce them one at a time to monitor your skin's reaction. Avoid combining too many harsh or potentially irritating ingredients at once.
  • Q: What if my skin gets irritated? A: If you experience any irritation, redness, or burning, stop using the remedy immediately. Consult a dermatologist if the irritation persists.
  • Q: Are these remedies suitable for all skin types? A: While generally gentle, these remedies may not be suitable for all skin types. Always patch test before applying to your entire face. If you have very sensitive skin, it's best to consult a dermatologist before trying any new remedies.
  • Q: Should I consult a dermatologist? A: If you have severe acne or persistent hyperpigmentation, it's always a good idea to consult a dermatologist. They can provide personalized advice and recommend appropriate treatments.

Remember, consistency and patience are essential. Be kind to your skin, and you'll eventually see the results you desire. Good luck on your journey to clearer, brighter skin!

Read More..

How to whiten skin with turmeric and sandalwood

Unlocking Radiant Skin: A Turmeric and Sandalwood Whitening Journey

For centuries, turmeric and sandalwood have held revered positions in traditional beauty practices, celebrated for their ability to nourish and brighten the skin. While they won't magically erase pigmentation, these natural ingredients offer a gentle approach to achieving a more even complexion. This article details how to harness their power for a radiant glow, emphasizing safe and effective usage.

Understanding the Power Duo: Turmeric and Sandalwood

The magic lies in the synergistic properties of these ancient remedies. Turmeric, a vibrant spice rich in curcumin, possesses potent anti-inflammatory and antioxidant qualities. Curcumin combats free radical damage, a primary contributor to uneven skin tone and premature aging. It also helps to reduce inflammation, which can exacerbate skin problems and dullness. Sandalwood, a fragrant wood renowned for its soothing and cooling effects, gently exfoliates, leaving skin feeling soft and smooth. Its anti-inflammatory properties complement turmeric’s, creating a powerful combination for skin rejuvenation.

Turmeric's Role in Skin Brightening

Turmeric's skin-brightening effects stem primarily from curcumin's ability to inhibit melanin production. Melanin is the pigment responsible for skin color. While not a bleaching agent, curcumin helps regulate melanin production, leading to a more even skin tone over time. It's crucial to note that turmeric's effect is gradual and requires consistent application for noticeable results. Results vary from person to person depending on skin type and existing pigmentation.

Sandalwood's Contribution to Healthy Skin

Sandalwood oil's cooling and anti-inflammatory properties soothe irritated skin, reducing redness and inflammation. Its gentle exfoliating action removes dead skin cells, revealing brighter, smoother skin underneath. Furthermore, sandalwood's astringent properties help to tighten pores and control excess oil, contributing to a clearer and more radiant complexion. Combining sandalwood's soothing properties with turmeric’s brightening action creates a powerful and balanced approach to skin care.

Crafting Your Turmeric and Sandalwood Mask: A Step-by-Step Guide

Creating a homemade mask is simple and allows you to control the ingredients and their concentration. Always perform a patch test on a small area of skin before applying it to your entire face to check for any allergic reactions.

Ingredients You'll Need:

  • 1 teaspoon turmeric powder
  • 1 teaspoon sandalwood powder (or 5-7 drops of sandalwood essential oil)
  • 2 tablespoons milk (or rose water/yogurt for alternative options)
  • Optional: 1/2 teaspoon honey (for added moisture)

Instructions:

  1. In a small bowl, thoroughly mix the turmeric powder, sandalwood powder (or oil), and your chosen liquid until you achieve a smooth paste.
  2. If using honey, gently stir it into the mixture.
  3. Apply a thin, even layer of the paste to your cleansed face, avoiding the eye area.
  4. Allow the mask to dry for 15-20 minutes.
  5. Rinse the mask off thoroughly with lukewarm water, using gentle, circular motions.
  6. Pat your skin dry with a soft towel and apply a moisturizer.

Important Considerations and Cautions

Consistency is key: Expect gradual results. Regular use, ideally 2-3 times a week, is necessary to see noticeable improvements in skin tone and texture.

Sun protection: Always apply a broad-spectrum sunscreen with an SPF of 30 or higher after using the mask, as turmeric can make your skin more sensitive to sunlight.

Patch test: Before applying the mask to your entire face, perform a patch test on a small area of skin to rule out any allergic reactions.

Individual results vary: The effectiveness of this mask may vary depending on individual skin types and concerns. If you have sensitive skin, start with less turmeric and increase gradually as tolerated.

While turmeric and sandalwood offer a natural approach to skin brightening, it’s essential to manage expectations. This method complements a holistic skincare routine, but it’s not a miracle cure for hyperpigmentation or severe skin conditions. For persistent skin concerns, consulting a dermatologist is always recommended.

Read More..

Unveiling Radiant Skin: A Sandalwood Paste Journey

The Allure of Sandalwood for Skin Brightening

For centuries, the enchanting aroma and remarkable properties of sandalwood have captivated cultures worldwide. Beyond its spiritual significance, sandalwood boasts a rich history in skincare, prized for its ability to gently brighten and revitalize the complexion. This article explores the transformative power of sandalwood paste, detailing a typical skin brightening journey, from initial application to the revelation of a more luminous you. We'll delve into the science behind its effectiveness and offer practical tips for maximizing your results. Prepare to witness the compelling before-and-after transformation that awaits!

Understanding the Science Behind Sandalwood's Brightening Effects

Sandalwood's skin-brightening magic stems from its unique chemical composition. Santalol, a key component, possesses potent anti-inflammatory properties, helping to soothe irritated skin and reduce redness â€" a common contributor to uneven skin tone. Furthermore, sandalwood exhibits antioxidant capabilities, combating free radical damage that dulls the complexion and accelerates aging. These actions, combined with its gentle exfoliating properties, contribute to a more even, radiant skin tone over time. The paste's cooling effect also helps to calm inflammation, creating an ideal environment for skin regeneration.

Preparing Your Sandalwood Paste: A Simple Recipe

Crafting your own sandalwood paste is remarkably straightforward. You'll need:

  • 1-2 tablespoons of sandalwood powder (choose 100% pure sandalwood powder for best results)
  • Enough rosewater or milk to create a smooth, spreadable paste

Simply combine the ingredients in a small bowl, stirring until you achieve the desired consistency. Adjust the liquid as needed to avoid a paste that's too thick or too runny. This homemade paste ensures you are using a natural product free from harsh chemicals.

The Before-and-After Transformation: A Visual Journey

While individual results may vary depending on skin type and consistency of use, many experience a noticeable improvement in their complexion after consistent application of sandalwood paste. Before photos often reveal uneven skin tone, blemishes, or dullness. After photos, taken after several weeks of regular use, typically show a reduction in blemishes, improved skin texture, and a more even, radiant complexion. The skin appears brighter, healthier, and more luminous, showcasing sandalwood's gentle yet effective skin brightening properties.

Maintaining Your Radiant Results

Sustaining your skin's newfound radiance requires ongoing care. Continue using the sandalwood paste regularly, perhaps 2-3 times a week, to maintain its brightening effects. Complement this with a consistent skincare routine that includes cleansing, moisturizing, and sun protection. Remember, sunscreen is crucial in protecting your newly brightened skin from the damaging effects of UV rays, which can reverse progress and lead to hyperpigmentation.

Conclusion: Embrace the Natural Radiance

Sandalwood paste offers a natural and effective path to a brighter, healthier complexion. Its gentle exfoliation, coupled with its anti-inflammatory and antioxidant properties, provides a holistic approach to skin brightening. By diligently following a simple routine and maintaining a consistent skincare regimen, you too can experience the remarkable before-and-after transformation that sandalwood promises. Embark on this journey to unveil your own naturally radiant skin.

Read More..

Can Baking Soda and Water Really Whiten Your Skin? Let's Talk!

Hey everyone! So, you're curious about using baking soda and water to lighten your skin tone? I get it. We're bombarded with promises of flawless, radiant skin, and it's tempting to try home remedies, especially when they seem so simple and readily available. But before you start mixing up a paste, let's dive into the reality of using baking soda for skin whitening. It's not quite the miracle cure many claim, and it's crucial to understand why.

Understanding the Hype: Why Baking Soda for Skin Whitening?

The idea behind using baking soda for skin whitening centers around its mild abrasive properties. Baking soda, or sodium bicarbonate, is slightly alkaline. Some people believe this alkalinity can help exfoliate the skin, removing dead skin cells that might contribute to a dull complexion. The logic is that by removing this dead layer, you reveal brighter, fresher skin underneath. Sounds good, right? Well, it’s a bit more complicated than that.

The Science (or Lack Thereof):

While baking soda *can* exfoliate, it's crucial to remember that it's a very harsh exfoliant. Your skin has a natural pH balance, and disrupting it with an alkaline substance like baking soda can lead to more problems than solutions. Over-exfoliating can cause irritation, redness, dryness, and even damage the skin's protective barrier, making it more vulnerable to environmental stressors and infections. There's simply no scientific evidence to support the claim that baking soda can actually lighten your skin tone in a significant or lasting way.

What often happens is that the temporary brightness you see after using a baking soda scrub is simply due to the removal of dead skin cells. This is not true skin whitening. Your natural skin tone will return once the skin regenerates.

How to Use Baking Soda (If You Decide to Try It - Proceed with Caution!)

I strongly advise against using baking soda as a skin whitening agent. However, if you're determined to try it despite the risks, proceed with extreme caution. Remember, this is not a proven method and could harm your skin. Always perform a patch test first!

The Patch Test: Your First Line of Defense

Before applying anything to your entire face or body, always do a patch test. Mix a tiny amount of baking soda with water to create a paste. Apply it to a small, inconspicuous area of skin (like the inside of your elbow) and wait for 24 hours. If you experience any redness, burning, itching, or irritation, do not use it on your face or body.

If you still decide to proceed (at your own risk):

  • Mix a small amount of baking soda with water: Aim for a paste-like consistency, not too thick and not too runny. A little goes a long way!
  • Gently massage the paste onto your skin: Use circular motions, avoiding harsh scrubbing. Focus on areas you want to exfoliate but avoid sensitive areas like under your eyes.
  • Rinse thoroughly with lukewarm water: Make sure you remove all traces of the baking soda paste.
  • Moisturize immediately: Baking soda can dry out your skin, so moisturizing is crucial after using it. Choose a gentle, hydrating moisturizer.
  • Use sparingly: Do not use this method more than once or twice a week, at most. More frequent use will likely lead to irritation.
  • Safer and More Effective Alternatives for Brighter Skin

    Instead of risking skin damage with baking soda, let's talk about safer and more effective ways to achieve brighter, healthier-looking skin:

  • Gentle exfoliation: Use a gentle scrub with natural ingredients like sugar or oatmeal. These are much less harsh than baking soda.
  • Chemical exfoliants: Products containing AHAs (alpha-hydroxy acids) or BHAs (beta-hydroxy acids) can help exfoliate and brighten the skin. Consult a dermatologist to find the right product for your skin type.
  • Sunscreen: This is the most important step! Sun damage is a major contributor to uneven skin tone and premature aging. Use a broad-spectrum sunscreen with an SPF of 30 or higher every day, even on cloudy days.
  • Hydration: Drinking plenty of water and using a good moisturizer keeps your skin hydrated and looking its best.
  • Healthy diet: A balanced diet rich in fruits, vegetables, and antioxidants can contribute to healthy, radiant skin.
  • Professional treatments: Consider professional treatments like chemical peels or microdermabrasion if you're looking for more significant skin brightening. A dermatologist can advise you on the best options for your skin.
  • The Bottom Line: Proceed with Caution (or Don't at All!)

    While the idea of using baking soda for skin whitening might seem appealing due to its simplicity and accessibility, the risks far outweigh the potential benefits. The abrasive nature of baking soda can lead to irritation, dryness, and damage to your skin's protective barrier. There's no scientific evidence to support its use for skin whitening, and the temporary brightness you might see is likely just due to the removal of dead skin cells, not actual lightening of your skin tone.

    If you're looking for brighter, more radiant skin, focus on proven methods like gentle exfoliation, sun protection, hydration, a healthy diet, and potentially professional treatments. Always consult a dermatologist for personalized advice and to address any specific skin concerns.

    Commonly Asked Questions

    Q: Will baking soda lighten my dark spots?

    A: No, there's no scientific evidence to suggest that baking soda can lighten dark spots. In fact, it could potentially irritate the skin, making dark spots even more noticeable.

    Q: Is baking soda safe for sensitive skin?

    A: No, baking soda is generally too harsh for sensitive skin. It can disrupt the skin's natural pH balance and cause irritation, redness, and dryness.

    Q: How often can I use a baking soda scrub?

    A: Even if you choose to use it, you shouldn't use a baking soda scrub more than once or twice a week, at most. More frequent use will likely lead to irritation and damage your skin barrier.

    Q: What are some better alternatives to baking soda for skin brightening?

    A: Consider gentle exfoliants with natural ingredients, chemical exfoliants (with a dermatologist's guidance), sun protection, hydration, a healthy diet, and professional treatments like chemical peels or microdermabrasion.

    Q: Can I mix baking soda with other ingredients for a better effect?

    A: While you might see recipes online combining baking soda with other ingredients, it's best to avoid this. Combining baking soda with other potentially irritating substances can increase the risk of skin damage. Stick to proven, safe skincare methods.

    Read More..

    Skin whitening treatments for reducing sun damage

    Reversing Sun Damage: A Guide to Effective Skin Whitening Treatments

    The sun, while essential for life, is a notorious culprit in premature aging and skin damage. Years of sun exposure can leave your skin looking dull, uneven in tone, and plagued with age spots, wrinkles, and hyperpigmentation. But don't despair! Modern dermatology offers a range of effective skin whitening treatments designed to tackle sun damage and restore your skin's youthful radiance. This guide will explore some of the most popular and effective options available, helping you navigate the choices and make informed decisions about your skin's health and appearance.

    Understanding Sun Damage and Hyperpigmentation

    Before diving into treatment options, it's crucial to understand the mechanisms behind sun-induced skin damage. Ultraviolet (UV) radiation from the sun triggers an increase in melanin production, the pigment responsible for skin color. This results in hyperpigmentation, manifesting as dark spots, freckles, and uneven skin tone. Beyond hyperpigmentation, prolonged sun exposure causes collagen and elastin breakdown, leading to wrinkles, sagging skin, and a loss of firmness. Therefore, effective skin whitening treatments target both the hyperpigmentation and the underlying structural damage caused by the sun.

    Topical Treatments: Your First Line of Defense

    Hydroquinone: A Powerful Pigment Inhibitor

    Hydroquinone is a potent topical ingredient that effectively inhibits melanin production. Dermatologists frequently prescribe hydroquinone creams to lighten dark spots and improve overall skin tone. However, it's crucial to use hydroquinone under strict medical supervision, as prolonged or improper use can lead to side effects like ochronosis (a rare but serious skin discoloration). Your dermatologist will determine the appropriate concentration and duration of use, ensuring safe and effective results.

    Retinoids: Exfoliation and Collagen Boost

    Retinoids, derivatives of vitamin A, are another powerhouse in the fight against sun damage. These ingredients accelerate cell turnover, promoting exfoliation and revealing brighter, more even-toned skin. Retinoids also stimulate collagen production, helping to improve skin texture and reduce the appearance of wrinkles. Start with a low concentration of retinoid and gradually increase it as your skin tolerates it to minimize irritation.

    Vitamin C Serums: Antioxidant Powerhouse

    Vitamin C is a potent antioxidant that protects your skin from further UV damage and helps to lighten existing hyperpigmentation. It neutralizes free radicals produced by sun exposure, reducing inflammation and promoting collagen synthesis. Vitamin C serums are generally well-tolerated and can be incorporated into your daily skincare routine. Look for serums with a high concentration of L-Ascorbic Acid for optimal efficacy.

    In-Office Procedures: Advanced Solutions for Significant Damage

    Chemical Peels: Controlled Exfoliation

    Chemical peels use different acids to exfoliate the skin, removing damaged outer layers and revealing smoother, brighter skin underneath. Different peel strengths cater to varying degrees of sun damage. Your dermatologist will determine the appropriate peel type based on your skin type and the severity of your sun damage. Post-procedure care is essential to minimize downtime and maximize results.

    Microdermabrasion: Mechanical Exfoliation

    Microdermabrasion uses a specialized device to gently abrade the skin's surface, removing dead skin cells and improving skin texture. This procedure is ideal for mild to moderate sun damage and can improve the appearance of fine lines, wrinkles, and uneven skin tone. It’s a less invasive option compared to chemical peels, often requiring multiple sessions for optimal results.

    Laser Treatments: Targeted Pigment Removal

    Laser treatments offer precise targeting of hyperpigmentation. Different laser types address specific concerns, such as age spots, freckles, and vascular lesions. These treatments should be performed by a qualified dermatologist or cosmetic surgeon. While effective, laser treatments may involve some downtime and potential side effects, which your doctor will discuss with you.

    Lifestyle Changes: Protecting Your Investment

    While treatments address existing damage, maintaining healthy skin requires ongoing commitment. This includes:

  • Daily sunscreen application (SPF 30 or higher): This is the most crucial step in preventing further sun damage.
  • Limiting sun exposure, especially during peak hours: Seek shade whenever possible and wear protective clothing.
  • Maintaining a healthy diet rich in antioxidants: This supports your skin's natural repair mechanisms.
  • Staying hydrated: Proper hydration keeps your skin looking plump and healthy.
  • Remember to consult a board-certified dermatologist to discuss your individual skin concerns and develop a personalized treatment plan. They will assess your skin type, the extent of sun damage, and recommend the most appropriate and effective course of action for achieving your desired results.

    Read More..

    Achieving Instant Skin Brightening: A Comprehensive Guide to DIY Masks

    The pursuit of radiant, luminous skin is a timeless endeavor. While numerous commercial products promise immediate brightening effects, many individuals seek natural and readily available alternatives. This comprehensive guide explores the creation and application of several DIY face masks designed to deliver instant skin brightening benefits. It is crucial to understand that the term "instant" in this context refers to a noticeable improvement in skin tone and luminosity immediately following application, rather than a permanent alteration of skin pigmentation. Long-term skin brightening requires consistent, holistic care.

    Understanding Skin Brightening Mechanisms

    Before delving into specific mask recipes, it is imperative to comprehend the underlying mechanisms that contribute to skin brightening. The appearance of dull or uneven skin tone is often attributed to several factors:

    Hyperpigmentation

    Hyperpigmentation, characterized by an overproduction of melanin, is a leading cause of uneven skin tone. Melanin is the pigment responsible for skin color. Excessive melanin production can result from sun exposure, hormonal changes, inflammation, or certain skin conditions. Brightening masks aim to reduce the appearance of hyperpigmentation by inhibiting melanin production or facilitating its exfoliation.

    Dullness and Dryness

    Dehydrated skin often appears dull and lackluster. A lack of hydration impedes the skin's ability to reflect light effectively, leading to a less radiant complexion. Many brightening masks incorporate hydrating ingredients to plump the skin and improve its reflectivity, creating an immediate brightening effect.

    Accumulation of Dead Skin Cells

    The accumulation of dead skin cells on the surface of the epidermis can contribute to a dull, uneven complexion. Exfoliation, whether through chemical or physical means, is essential for revealing brighter, healthier skin underneath. Many DIY masks incorporate gentle exfoliating agents to remove dead skin cells and promote cell turnover.

    Choosing the Right Ingredients: A Critical Analysis

    The effectiveness of a DIY brightening mask hinges on the careful selection of ingredients. Several natural ingredients possess properties that can contribute to immediate skin brightening:

    Lemon Juice

    Lemon juice is a rich source of vitamin C, a potent antioxidant known for its skin-brightening properties. Vitamin C inhibits melanin production and promotes collagen synthesis, contributing to a more even and radiant complexion. However, it's crucial to use lemon juice cautiously and dilute it appropriately to avoid skin irritation. Direct application of undiluted lemon juice can be harsh and sensitizing.

    Yogurt

    Yogurt, particularly plain yogurt, contains lactic acid, a natural alpha-hydroxy acid (AHA). AHAs gently exfoliate the skin, removing dead skin cells and revealing brighter skin underneath. Yogurt also possesses soothing and hydrating properties, making it a suitable base for many brightening masks.

    Honey

    Honey is a natural humectant, meaning it attracts and retains moisture. Its hydrating properties plump the skin, improving its reflectivity and creating an immediate brightening effect. Honey also possesses antibacterial and anti-inflammatory properties, which can benefit sensitive skin.

    Turmeric

    Turmeric contains curcumin, a potent antioxidant with anti-inflammatory properties. While not directly a "brightener" in the sense of inhibiting melanin, curcumin's anti-inflammatory effects can reduce redness and inflammation, contributing to a more even and radiant complexion. However, it can stain the skin temporarily, so caution is advised.

    Aloe Vera

    Aloe vera is renowned for its soothing and healing properties. It can reduce inflammation and redness, improving the overall appearance of the skin and contributing to a brighter complexion. Its hydrating properties also contribute to skin plumpness.

    DIY Brightening Mask Recipes: A Step-by-Step Guide

    The following recipes provide a starting point for creating effective DIY brightening masks. Remember to always perform a patch test on a small area of skin before applying the mask to your entire face to check for any allergic reactions.

    Yogurt and Honey Brightening Mask

    Ingredients: 2 tablespoons plain yogurt, 1 tablespoon honey. Instructions: Gently mix the yogurt and honey until a smooth paste forms. Apply evenly to the face, avoiding the eye area. Leave on for 15-20 minutes, then rinse thoroughly with lukewarm water. This mask provides gentle exfoliation and hydration, leaving the skin feeling soft and radiant.

    Lemon and Honey Brightening Mask (Use with Caution)

    Ingredients: ½ teaspoon lemon juice, 1 tablespoon honey, 1 tablespoon plain yogurt. Instructions: Mix the ingredients thoroughly. Apply a thin layer to the face, avoiding the eye area. Leave on for 5-10 minutes (monitor closely for any signs of irritation). Rinse thoroughly with lukewarm water and follow with a moisturizer. The lemon juice should be used sparingly due to its potential for irritation. This mask provides gentle exfoliation and brightening benefits but needs careful monitoring.

    Turmeric and Yogurt Brightening Mask

    Ingredients: ½ teaspoon turmeric powder, 2 tablespoons plain yogurt. Instructions: Mix the turmeric powder and yogurt until a smooth paste forms. Apply evenly to the face, avoiding the eye area. Leave on for 10-15 minutes, then rinse thoroughly with lukewarm water. This mask helps to reduce inflammation and redness, contributing to a more even complexion. Be aware of potential staining.

    Post-Mask Care and Precautions

    Following the application of any brightening mask, it is essential to adopt appropriate post-mask care practices:

    • Gentle Cleansing: After rinsing the mask, gently cleanse your face with a mild cleanser to remove any residual mask ingredients.
    • Moisturization: Apply a moisturizer to hydrate and protect your skin. This is especially important after using masks with exfoliating ingredients.
    • Sun Protection: Many brightening ingredients increase the skin's sensitivity to sunlight. Always apply a broad-spectrum sunscreen with an SPF of 30 or higher after using a brightening mask, especially when going outdoors.
    • Consistency: For optimal results, incorporate DIY brightening masks into a regular skincare routine, using them 1-2 times per week.
    • Patch Testing: Always perform a patch test before applying any new mask to your entire face to check for allergic reactions.
    • Discontinue Use if Irritation Occurs: If you experience any irritation, redness, or burning sensation, discontinue use immediately and consult a dermatologist.

    While DIY brightening masks can offer immediate improvements in skin tone and luminosity, it's crucial to remember that they are not a substitute for professional dermatological advice. For persistent hyperpigmentation or other skin concerns, consulting a dermatologist is recommended to determine the underlying cause and develop a comprehensive treatment plan.

    Read More..

    Achieving Even Skin Tone Naturally: A Comprehensive Guide to Home Remedies

    Achieving an even skin tone is a common cosmetic goal, often pursued through various commercial products. However, numerous natural remedies offer effective and gentler alternatives. This comprehensive guide explores a range of home treatments utilizing readily available ingredients, emphasizing a holistic approach to skin health. It’s crucial to remember that individual results may vary, and a patch test is always recommended before applying any new substance to a large area of skin. Consistency and patience are key to witnessing significant improvements.

    Understanding Uneven Skin Tone

    Uneven skin tone, characterized by patches of discoloration, is a multifaceted issue. Several factors contribute to this aesthetic concern:

    Causes of Uneven Skin Tone:

    • Sun exposure: Ultraviolet (UV) radiation from the sun is a primary culprit, causing hyperpigmentation (dark spots) and uneven tanning.
    • Hormonal changes: Fluctuations in hormone levels, particularly during pregnancy or menopause, can trigger changes in melanin production, leading to discoloration.
    • Inflammation: Acne, eczema, and other inflammatory skin conditions can leave behind hyperpigmentation or hypopigmentation (lighter spots).
    • Genetics: Familial predisposition to certain skin conditions and melanin production patterns plays a significant role.
    • Age: As we age, the skin's ability to regenerate and repair itself diminishes, leading to a less even complexion.
    • Medications: Certain medications can cause photosensitivity or changes in skin pigmentation as a side effect.
    • Poor diet: A diet lacking essential nutrients can negatively impact skin health, contributing to unevenness.

    Natural Remedies for Even Skin Tone

    Numerous natural ingredients possess properties beneficial for improving skin tone. The following remedies, when used consistently and correctly, can help reduce hyperpigmentation and promote a more even complexion.

    1. Aloe Vera:

    Aloe vera gel, known for its soothing and anti-inflammatory properties, can help reduce redness and inflammation, thereby minimizing the appearance of unevenness. Apply fresh aloe vera gel directly to the affected areas twice daily.

    2. Lemon Juice:

    The citric acid in lemon juice acts as a natural bleaching agent, helping to lighten dark spots. However, it should be used cautiously and diluted with water to prevent skin irritation. Apply diluted lemon juice to affected areas, avoiding direct sunlight afterward, as it can increase photosensitivity.

    3. Turmeric:

    Turmeric's curcumin content possesses potent anti-inflammatory and antioxidant properties. It can help reduce hyperpigmentation and promote skin regeneration. Mix turmeric powder with a small amount of water or milk to create a paste. Apply it to the skin, leave it on for 15-20 minutes, and then rinse thoroughly. Regular use can gradually improve skin tone.

    4. Yogurt:

    Plain yogurt contains lactic acid, a gentle alpha-hydroxy acid (AHA) that helps exfoliate the skin and lighten dark spots. Apply plain yogurt to the face, leave it on for 15-20 minutes, and then rinse. This can be done 2-3 times a week.

    5. Honey:

    Honey is a natural humectant, meaning it attracts and retains moisture. Its antioxidant properties also help protect the skin from damage. Applying raw honey directly to the skin can help hydrate and improve skin tone. Leave it on for 15-20 minutes before rinsing.

    6. Sandalwood Paste:

    Sandalwood paste, traditionally used in skincare, has cooling and soothing properties. It can help reduce inflammation and even out skin tone. Mix sandalwood powder with a little water or rose water to create a paste and apply it to the skin. Rinse after 20 minutes.

    7. Potato Juice:

    Potatoes contain enzymes that can help lighten dark spots. Applying fresh potato juice to affected areas can gradually improve skin tone. Simply grate a potato and extract the juice, applying it directly to the skin.

    8. Oatmeal Scrub:

    Oatmeal possesses gentle exfoliating properties that can help remove dead skin cells, revealing a more even complexion. Mix finely ground oatmeal with water or honey to create a scrub. Gently massage the scrub onto the skin, then rinse thoroughly. Use this 1-2 times per week.

    9. Papaya:

    Papaya contains papain, an enzyme that helps exfoliate the skin and reduce hyperpigmentation. Mash ripe papaya and apply it to the skin as a mask. Leave it on for 15-20 minutes before rinsing.

    Lifestyle Changes for Even Skin Tone

    In addition to topical remedies, lifestyle adjustments play a crucial role in achieving an even skin tone.

    Essential Lifestyle Modifications:

    • Sun protection: Consistently use a broad-spectrum sunscreen with an SPF of 30 or higher, even on cloudy days, to protect the skin from harmful UV radiation.
    • Hydration: Drink plenty of water to keep the skin hydrated and healthy. Dehydration can worsen skin dryness and unevenness.
    • Balanced diet: Consume a diet rich in fruits, vegetables, and antioxidants to support skin health and regeneration.
    • Stress management: Chronic stress can negatively impact skin health. Practicing stress-reducing techniques like yoga, meditation, or deep breathing can benefit skin tone.
    • Adequate sleep: Aim for 7-8 hours of quality sleep each night to allow the skin to repair itself.
    • Gentle cleansing: Avoid harsh cleansers that can strip the skin of its natural oils, leading to dryness and irritation.

    Important Considerations

    While natural remedies offer a gentle approach, it’s important to manage expectations. Results may take several weeks or even months to become noticeable. Persistence and consistency are essential. If you have severe hyperpigmentation or underlying skin conditions, consult a dermatologist for personalized treatment options.

    Always perform a patch test before applying any new natural remedy to your entire face or body. This helps identify potential allergic reactions or sensitivities. If you experience any adverse reactions such as itching, burning, or swelling, discontinue use immediately and consult a healthcare professional.

    Remember that maintaining a healthy lifestyle and practicing sun protection are crucial for long-term success in achieving and maintaining an even skin tone. Combining natural remedies with a holistic approach to skincare yields the best results.

    Read More..

    Unveiling the Secrets of Manjistha: A Traditional Indian Approach to Skin Whitening

    For centuries, Indian women have harnessed the power of nature to enhance their beauty. Among the many botanical treasures, manjistha (Rubia cordifolia) stands out as a prized ingredient in traditional skin whitening remedies. This vibrant red root, rich in active compounds, doesn't just lighten the skin; it addresses underlying issues contributing to dullness and uneven skin tone. Unlike harsh chemical treatments, manjistha offers a gentle yet effective approach, revealing a radiant complexion from within.

    Understanding Manjistha's Skin-Brightening Properties

    Manjistha’s skin-brightening prowess stems from its potent blend of natural compounds. Anthraquinones, the primary active components, act as powerful antioxidants, combating free radical damage that causes premature aging and dullness. They also possess anti-inflammatory properties, soothing irritated skin and reducing redness. Furthermore, manjistha stimulates blood circulation, promoting a healthy glow by delivering vital nutrients to the skin cells. This results in a more even skin tone, gradually reducing the appearance of hyperpigmentation.

    The Science Behind the Radiance

    Researchers have identified specific anthraquinones in manjistha, such as purpurin and alizarin, which exhibit significant tyrosinase inhibition. Tyrosinase is an enzyme responsible for melanin production â€" the pigment responsible for skin color. By gently inhibiting tyrosinase activity, manjistha helps to regulate melanin production, leading to a more even and brighter complexion without completely blocking melanin, which is crucial for sun protection.

    Incorporating Manjistha into Your Skin Care Routine

    Integrating manjistha into your skincare routine is remarkably straightforward. You can easily find manjistha powder in most Indian grocery stores or online retailers. However, always choose high-quality, ethically sourced powder for the best results. Here are a few popular methods:

    Manjistha Face Mask

    A simple and effective method involves creating a face mask. Mix one to two teaspoons of manjistha powder with enough milk or yogurt to form a paste. Apply this paste evenly to your face, avoiding the eye area. Leave it on for 15-20 minutes, then rinse thoroughly with lukewarm water. This mask gently exfoliates, brightens, and nourishes the skin.

    Manjistha Body Scrub

    For a full-body brightening treatment, combine manjistha powder with a carrier oil like coconut or almond oil to create a gentle scrub. Gently massage this mixture onto your skin in circular motions, focusing on areas with uneven pigmentation. Rinse well and pat your skin dry. This scrub not only brightens but also leaves your skin feeling soft and smooth.

    Precautions and Considerations

    While generally safe, it's important to exercise caution when using manjistha. Always perform a patch test on a small area of skin before applying it to your entire face or body to check for any allergic reactions. Start with a small amount and gradually increase the concentration if needed. Individuals with sensitive skin may experience mild tingling or redness, which usually subsides quickly. Remember that results vary depending on individual skin type and consistency of use; patience and regular application are key.

    Moreover, it's crucial to remember that manjistha powder is a natural remedy, not a miracle cure. While it offers a gentle and effective approach to skin brightening, consistent sun protection remains vital to maintain a healthy and radiant complexion. Combine your manjistha treatments with a good sunscreen and a balanced diet for the best results.

    Read More..

    Unveiling the Secrets of Gram Flour and Yogurt for Radiant Skin

    For centuries, women across South Asia have relied on natural ingredients to enhance their complexion. Among the most celebrated is the simple yet powerful combination of gram flour (besan) and yogurt, a dynamic duo that forms the basis of many traditional skin whitening masks. These masks don't promise miraculous overnight transformations, but rather offer a gentle, nourishing approach to achieving a brighter, more even skin tone. This article delves into the science and application of these remarkable masks, revealing why they've stood the test of time.

    Understanding the Power Ingredients

    The effectiveness of gram flour and yogurt masks stems from the unique properties of each ingredient. Gram flour, derived from chickpeas, acts as a remarkable exfoliant. Its fine texture gently scrubs away dead skin cells, revealing the brighter, fresher skin underneath. This exfoliating action is crucial for preventing clogged pores and promoting cell turnover, leading to a more radiant appearance. Furthermore, gram flour possesses mild astringent properties, helping to tighten pores and reduce excess oil. It also boasts anti-inflammatory benefits, soothing irritated skin and reducing redness.

    The Yogurt Advantage

    Yogurt, particularly plain, unsweetened varieties, adds another layer of benefits to this potent mask. It's rich in lactic acid, a natural alpha-hydroxy acid (AHA). AHAs are celebrated for their ability to gently exfoliate the skin, further enhancing the gram flour's action. Lactic acid also helps to brighten the skin by reducing hyperpigmentation, the uneven distribution of melanin that leads to dark spots and patches. In addition, yogurt's moisturizing properties counteract any potential dryness from the exfoliation process, leaving the skin feeling soft and supple.

    Creating and Applying Your Mask: A Step-by-Step Guide

    Crafting a gram flour and yogurt mask is surprisingly easy. Simply combine equal parts of gram flour and plain yogurt in a bowl. The consistency should be smooth and spreadable; add a little more yogurt if it's too thick, or more gram flour if it's too runny. The key is to achieve a paste that clings comfortably to your skin.

    Application and Removal

    After cleansing your face, apply a thin, even layer of the mask, avoiding the eye area. Let it sit for 15-20 minutes, allowing the ingredients to work their magic. You'll feel a slight tightening sensation as the mask dries â€" this is a normal sign of its astringent properties. Once the time is up, gently rinse the mask off with lukewarm water, using circular motions to further exfoliate the skin. Pat your face dry with a soft towel and follow up with your usual moisturizer.

    Maximizing Results and Addressing Concerns

    To enhance the effectiveness of your gram flour and yogurt mask, consider these tips:

    • Consistency is key: Use the mask 1-2 times a week for optimal results.
    • Patch test first: Before applying the mask to your entire face, perform a patch test on a small area of skin to check for any allergic reactions.
    • Sun protection: After using the mask, be sure to apply a broad-spectrum sunscreen with an SPF of 30 or higher, as exfoliation can make your skin more sensitive to the sun.
    • Listen to your skin: If your skin feels irritated or overly dry, reduce the frequency of application or adjust the ratio of ingredients.

    While gram flour and yogurt masks are generally safe and effective, it's crucial to listen to your skin and discontinue use if you experience any adverse reactions. For persistent skin concerns, consult a dermatologist for personalized advice and treatment.

    Read More..